I wanted to experiment with putting all the elements together, so the makeup, hair and outfit. I start off with the makeup and the steps are shown below.
Makeup
Equipment:
-moisturiser
-primer
-illuminator
-foundation
-concealer x2
-buffing brush
-brightening powder
-small powder brush
-cream highlighter
-cream contour
-duo fibre brush
-disposable mascara wand
-individual fake eye lashes, natural and more intense
-duo lash glue
-red lip stick
-lip brush
Step by step:
1. I applied a moisturiser to hydrate the skin.
2. I used a primer to put all over the face so that the makeup I put on top applied smoothly and stayed in place.
3. I applied an illuminator on the tops of the cheek bones, in the centre of the forehead, down the bridge of the nose, on the cupids bow and on the chin to give these areas a subtle glow before I apply the foundation.
4. I mixed a foundation with an illuminator, so that the foundation had a dewy finish, and applied it to the face with a buffing brush very sparsely on the face. I didn't want the face to look too heavy, but I still wanted to cover any imperfections.
5. I then concealed any imperfections with some concealer, the same colour as her face and blended that in with my fingers.
6. I applied some concealer, that was a shade lighter than her face, under her eyes to brighten any dark circles. I blended this in with my fingers.
7. I applied a small amount of brightening powder under her eyes to set the concealer so that it didn't crease and to brighten them further.
8. I applied a cream highlighter to anywhere I added the illuminator to highlighter the face further using my fingers. I didn't apply this to the chin as I didn't want to create a greasy look. I also applied this to the inner corners of the eyes and on the eye lid to brighten the eyes.
9. I contoured the cheek bones very lightly with a cream contour to give the face a bit of definition. I also applied this lightly on the temples and either sides of the nose.
10. I brushed through the eye brows to put them in place but I didn't add any product as I didn't think it was necessary. However if my model has more sparse eye brows then I will add product, but keep them looking very natural and soft.
11. I applied some individual fake eye lashes, sparsely and randomly, along my top and bottom eye lashes to give a spider-like effect. I used duo lash glue to do this. In the image on the left, I only used the more natural individual eye lashes and then on the right I added a mixture of the natural ones and then some more dramatic ones too.
12. I used a red lip stick and a lip brush to paint on the tulip lip shape, as seen below.


I am really happy with how the makeup turned out! I love how glowy and dewy the face looks because it gives a fresh face and natural look and it follows the SS16 trend of dewy skin and strobing. I decided to use all cream products on the face so that the skin didn't look cakey or powdery. I have very naturally full eye brows so I didn't need to apply any product to them, however my model's eye brows are slightly more sparse so I think I will need to add some product; however I still want the eye brows to look very natural and soft. I was nervous about how the eye lashes would look but I am really happy with how they turned out. I originally only used individual fake eye lashes, but I felt like they looked too natural so I cut up a pair of more dramatic eye lashes and applied some of them on the top lash line to give them more definition. I like how natural the eye lashes look but how they also look slightly avant-garde which I think gives it a high fashion look. I didn't want to put too many on
Hair
Equipment
-paddle brush
-small hair elastics
-hair bands
-hair grips
-hair spray
Hair Look 1
This is the design I decided to do for the hair based on my face chart. I only did it roughly because I wanted to get an idea of what the hair looked like before I spent ages trying to get it to look perfect and then not liking it. I also already had a feeling it would look too fussy with the makeup. The model that I'm using has very dark hair just like me and I found that when I put the plaits in my hair they didn't really show up. I think the plaits would work better in blonde hair because there are more different colours, making the plaits more visible, but they looked pointless in my hair. I only did the bun very roughly, but I felt like there was too much going in with the hair and I wanted the focus to be more on the makeup; however I felt the big bun was taking too much attention. I like that it looks very traditional, but I think I am going to modify it slightly to give it a more simple look.
Hair Look 2
I decided that I wanted the hair to be very simple and I wanted the hair to be off the face because I wanted the makeup to be the main focus; I therefore put all the hair up into a ponytail. I like that the hair looks more simplistic and that the over all look isn't as fussy; however I wanted the hair to flow more loosely to reflect Jonathan Saunders' very relaxed and flowy looking collection. If I used this hair style I would definitely need to straighten the model's hair so that the hair looked more styled and less messy.
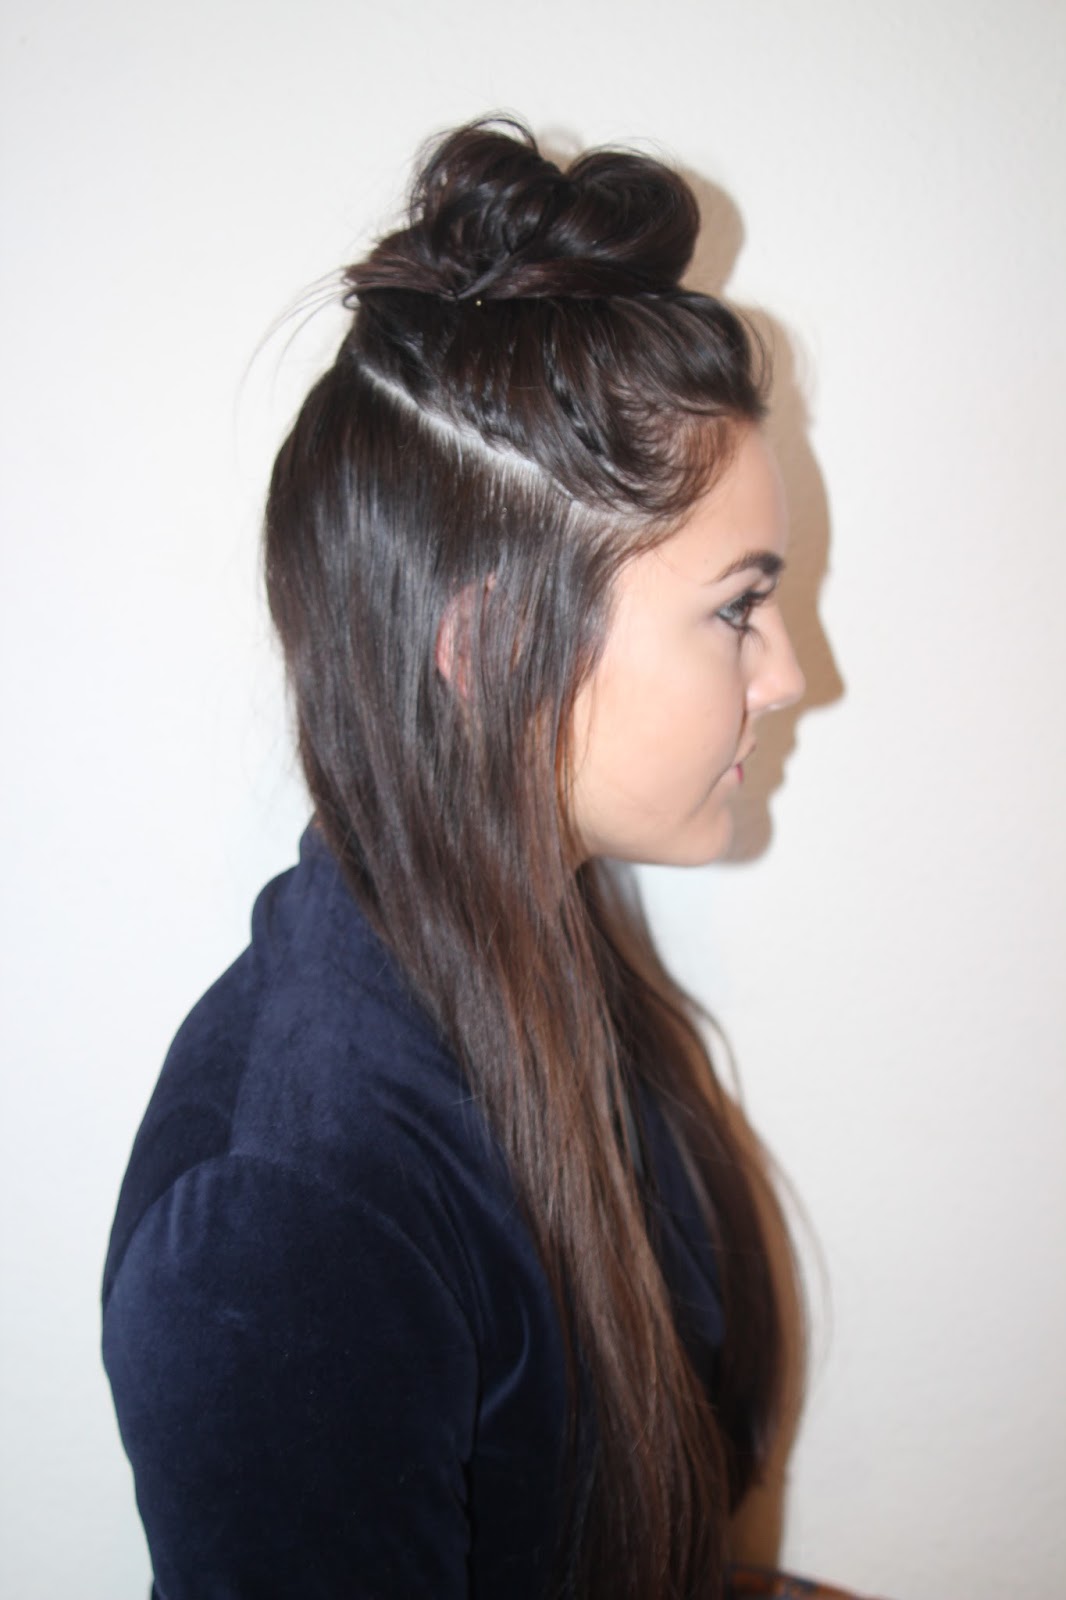
Hair Look 3 - Chosen Style
This is the hairstyle I chose to do on my model because it keeps the hair off the face but it still has half the hair down to flow while she walks. I think the wet-look effect used on the top half of hair gives the hair a clean look, without looking too neat or slick. I like that I incorporated a spring/summer 2016 trend in my look with the wet-look style as it keeps the look very on trend. I was inspired to do the hair half up and half down by the oriental hair styles I looked into. I wanted to keep the oriental aspect to the look, but I wanted the hair to look more simple so I thought this was a happy medium. I really like that the back of the hair is loose because it gives the look a more relaxed feel. Below is the hair chart showing my final hair look.
Equipment
-paddle brush
-small hair elastics
-hair bands
-hair grips
-hair spray
Step by step:
- Brush the hair through and spray heat protectant all over the hair.
- Straighten the hair in small sections to give a very smooth and sleek look.
- Take a section from her temples up, using a pin tail comb, making it as neat as possible.
- Smooth this top section back and into a ponytail to create a half up, half down look.
- Add hair spray to the ponytail to tame any fly aways and brush through the hair to make it look smooth and sleek.


No comments:
Post a Comment