Equipment:
-Johnson's Baby Lotion
-L'Oreal True Match Foundation in W1
-Nars Illuminator in Copacabana
-Real Techniques Contour Brush
-Maybelline Age Rewind Concealer in Light
-Rimmel Stay Matte Powder in Transparent
-Real Techniques Setting Brush
-Urban Decay Eye Shadow in Faint
-Illamasqua Angled Brush
-Benefit Hoola Bronzer
-Zoeva Luxe Sheer Cheek Brush
-Mary Luminizer Highlighter
-Urban Decay Primer Potion
-Sleek Ultra Mattes V1 Palette
-Zoeva Luxe Soft Crease Brush
-Bare Minerals Shimmer Eyeshadow in Azure
-Urban Decay Flat Brush
-Mac Fix+
-Max Factor Wild Shadow Pot in Sapphire Rage
-Zoeva Luxe Petite Crease Brush
-Zoeva Pencil Brush
-Glitter Splash glitter in Tropical Lime
-Rimmel 24 Hour Supercurler Mascara
-Duo Lash Glue
-Ardell Demi Wispies
-the theBalm Nude Tude Eyeshadow Palette
Step by step:
1. I first applied Johnson's Baby Lotion to the skin to hydrate the skin.
2. I applied a mixture of L'Oreal True Match Foundation in W1 and Nars Illuminator in Copacabana all over the face and down the neck with the Real Techniques Contour Brush.
3. I next applied the Maybelline Age Rewind Concealer in Light under the eyes in a triangle shape, in the centre of the forehead, down the nose, on the cupids bow and on the chin to highlight and conceal those areas. I applied this on any imperfections too with my fingers.
4. I powdered under the eyes with the Rimmel Stay Matte Powder in Transparent and the Real Techniques Setting Brush on any other areas I want to be matte, like either side of the nose.
5. I applied some Urban Decay Eye Shadow in Faint to the sparse areas of the eye brows with the Illamasqua Angled Brush.
6. I lightly contoured the cheek bones with Benefit Hoola Bronzer with the Zoeva Luxe Sheer Cheek Brush under the cheek bones, on the temples and either side of the nose.
7. I applied the Mary Luminizer Highlighter to the tops of the cheek bones, down the nose, on the cupids bow and lightly on the forehead. I did this with the Real Techniques Setting Brush.
8. I applied some Urban Decay Primer Potion to the eye lids to prevent the eye shadow from creasing.
9. I powdered over the top of the primer with Rimmel Stay Matte Powder in Transparent and the Real Techniques Setting Brush so that the powder eye shadows blend more seamlessly on top.
Look 1 (darker version)
10. I first blended the lightest blue eye shadow from the Sleek Ultra Mattes V1 Palette into the crease as a transition colour.
11. I next added the Bare Minerals Shimmer Eyeshadow in Azure on the eye lid with the Urban Decay Flat Brush sprayed with Mac Fix+.
12. I then blended Max Factor Wild Shadow Pot in Sapphire Rage into the crease and on the outer third of the eye lid and inner third. I did this with the Zoeva Luxe Petite Crease Brush for precision.
13. I then darkened the crease and inner and outer thirds of the eye with dark blue eye shadow in the Sleek Ultra Mattes V2 and the Zoeva Pencil Brush. I also applied this colour to the outer and inner third of the lower lash line with the same brush.
14. I applied the Bare Minerals Shimmer Eyeshadow in Azure with the Zoeva Pencil brush to the centre of the lower lash line and blended the colours together.
15. I then dabbed some Glitter Splash glitter in Tropical Lime on the eye lid to disperse the glitter lightly so that the blue Bare Minerals Eyeshadow would still show through.
16. I applied a coat of Rimmel 24 Hour Supercurler Mascara to the top and bottom eye lashes.
17. I added the Ardell Demi Wispies to the upper lash line with Duo Lash Glue.
18. I applied the colour Sassy from the theBalm Nude Tude Eyeshadow Palette to the inner corner and on the brow bone with the Zoeva Pencil Brush.
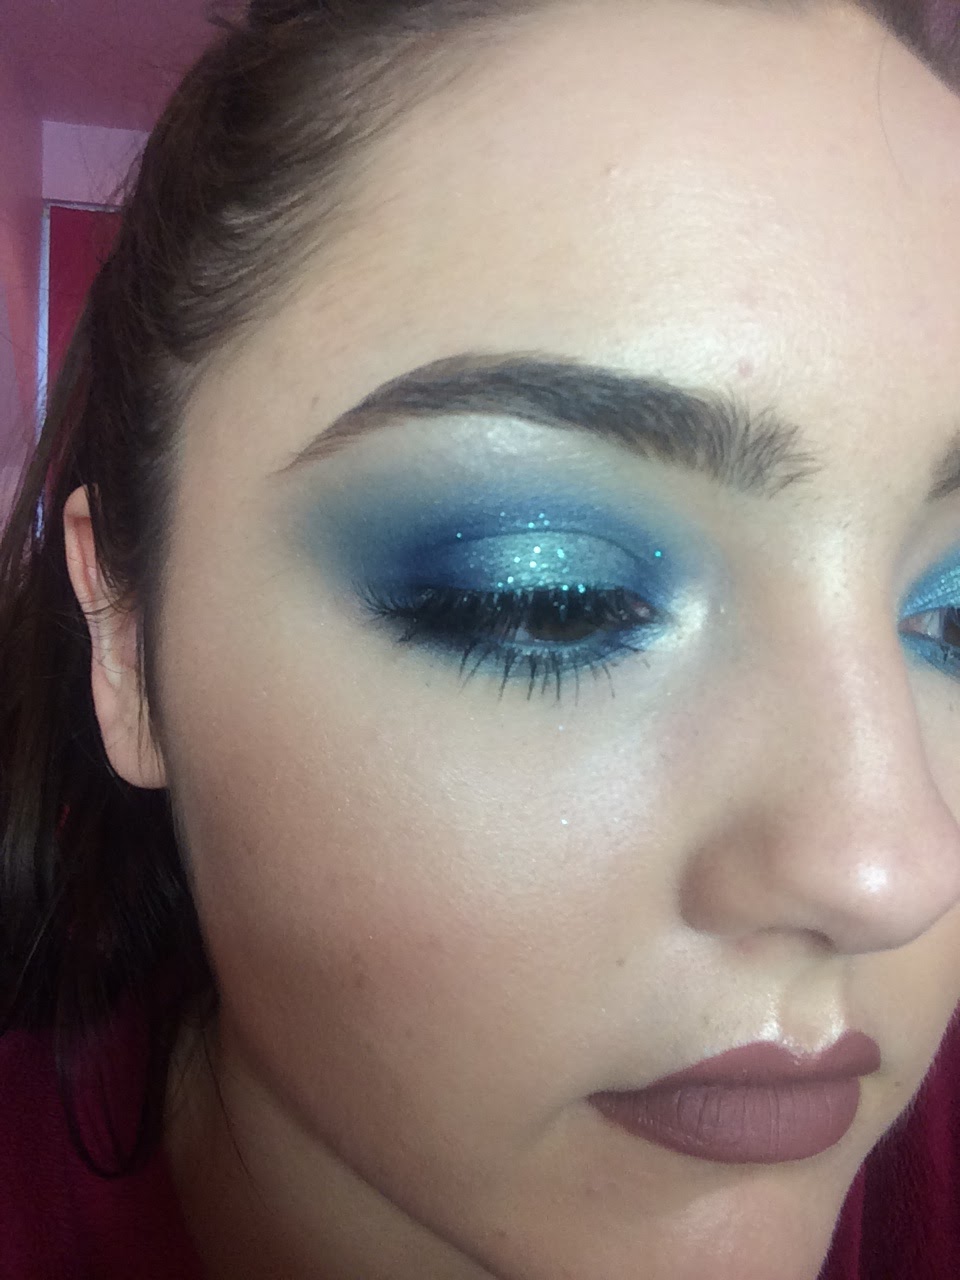

Look 2 (Chosen)
10. I first blended the lightest blue eye shadow from the Sleek Ultra Mattes V1 Palette into the crease as a transition colour with the Zoeva Luxe Soft Crease Brush.
11. I next added the Bare Minerals Shimmer Eyeshadow in Azure on the eye lid with the Urban Decay Flat Brush sprayed with Mac Fix+.
12. I then blended Max Factor Wild Shadow Pot in Sapphire Rage into the crease and on the outer third of the eye lid and inner third. I did this with the Zoeva Luxe Petite Crease Brush for precision.
13. I applied Max Factpr Wild Shadow Pot in Sapphire Rage to the inner and outer third of the lower lash line with the Zoeva Pencil Brush.
14. I applied the Bare Minerals Shimmer Eyeshadow in Azure with the Zoeva Pencil Brush to the centre of the lower lash line and blended the colours together.
15. I applied a coat of Rimmel 24 Hour Supercurler Mascara to the top and bottom eye lashes.
16. I added the Ardell Demi Wispies to the upper lash line with Duo Lash Glue.
17. I applied the colour Sassy from the theBalm Nude Tude Eyeshadow Palette to the inner corner and on the brow bone with the Zoeva Pencil Brush.


I much prefer this eye makeup look to the previous because the two blue eye shadow blend into each other seamlessly to create a bright, summery look. I think this looks more effortless than the look above and more youthful and I think the bright eye makeup will look gorgeous in contrast with my model's deep skin tone. I love how intense the Bare Minerals Eyeshadow looks when applied with a wet flat brush because the pigments are intensified and made more vibrant and metallic looking. I am happy I added an eye shadow primer so that the eye shadow stays exactly where I put it and doesn't melt and crease under the warm studio lights. I like that the skin isn't dewy looking all over because that can sometimes be unflattering so I added powder to any areas I wanted to reduce the shine, like under the eyes and the side of the nose so I only highlighter the high points of the face. I also didn't want all the skin to have a dewy finish because I wanted the metallic eye shadows to stand out and I thought the sheen of the skin would take some emphasis off the sheen on the eyes. I will give my model a matte nude lip, so I will take a selection of nude colours and try them on when I get to the shoot to find the perfect colour. I want to warm up the crease slightly to make it blend it with the skin more seamlessly and to make the look more bronzy, so I will add a warm transition shade into the crease instead of the light blue.
No comments:
Post a Comment