Dewy Skin
Equipment:
-moisturiser
-hydrating primer
-illuminater
-foundation
-buffing brush
-concealer
-brightening concealer
-cream highlighter
-powder highlighter
-highlighter brush
-bronzer
-fluffy brush
-translucent powder
-powder brush
Step by step:
1. I first added a hydrating moisturiser to the skin and then added a hydrating primer to make sure the skin if prepared for the makeup.
2. I then added an illuminater to the top of the cheek bones, on the centre of the forehead, down the bridge of the nose, on the Cupid's bow and in the centre of the chin so that these areas have a 'glowing from within' look.
3. I mixed the foundation with the illuminater and applied a light layer of this all over the face, including the eyelids and down the neck. I used a buffing brush to do this.
4. I added a concealer the same colour as the foundation to any areas of the face that need further coverage.
5. I added a brightening concealer, a couple shades lighter than the foundation underneath the eyes in a triangle shape, in the centre of the forehead, down the nose, on the Cupid's bow and on the chin. I blended this concealer out using the warmth of my fingers.
6. I put a small amount of translucent powder under the eyes to set the concealer so it wouldn't crease. I also applied some powder to any areas of the face I didn't want to look dewy, like either side of the nose and the sides of the mouth etc.
7. I applied a cream highlight to any of the areas I added the illuminater to give them a glossy finish.
8. I went over that highlight with a powder highlight to make it even more intense.
9. I added some bronzing powder under the cheek bones, round the forehead and either side of the nose to make the skin look more bronzy and contoured.

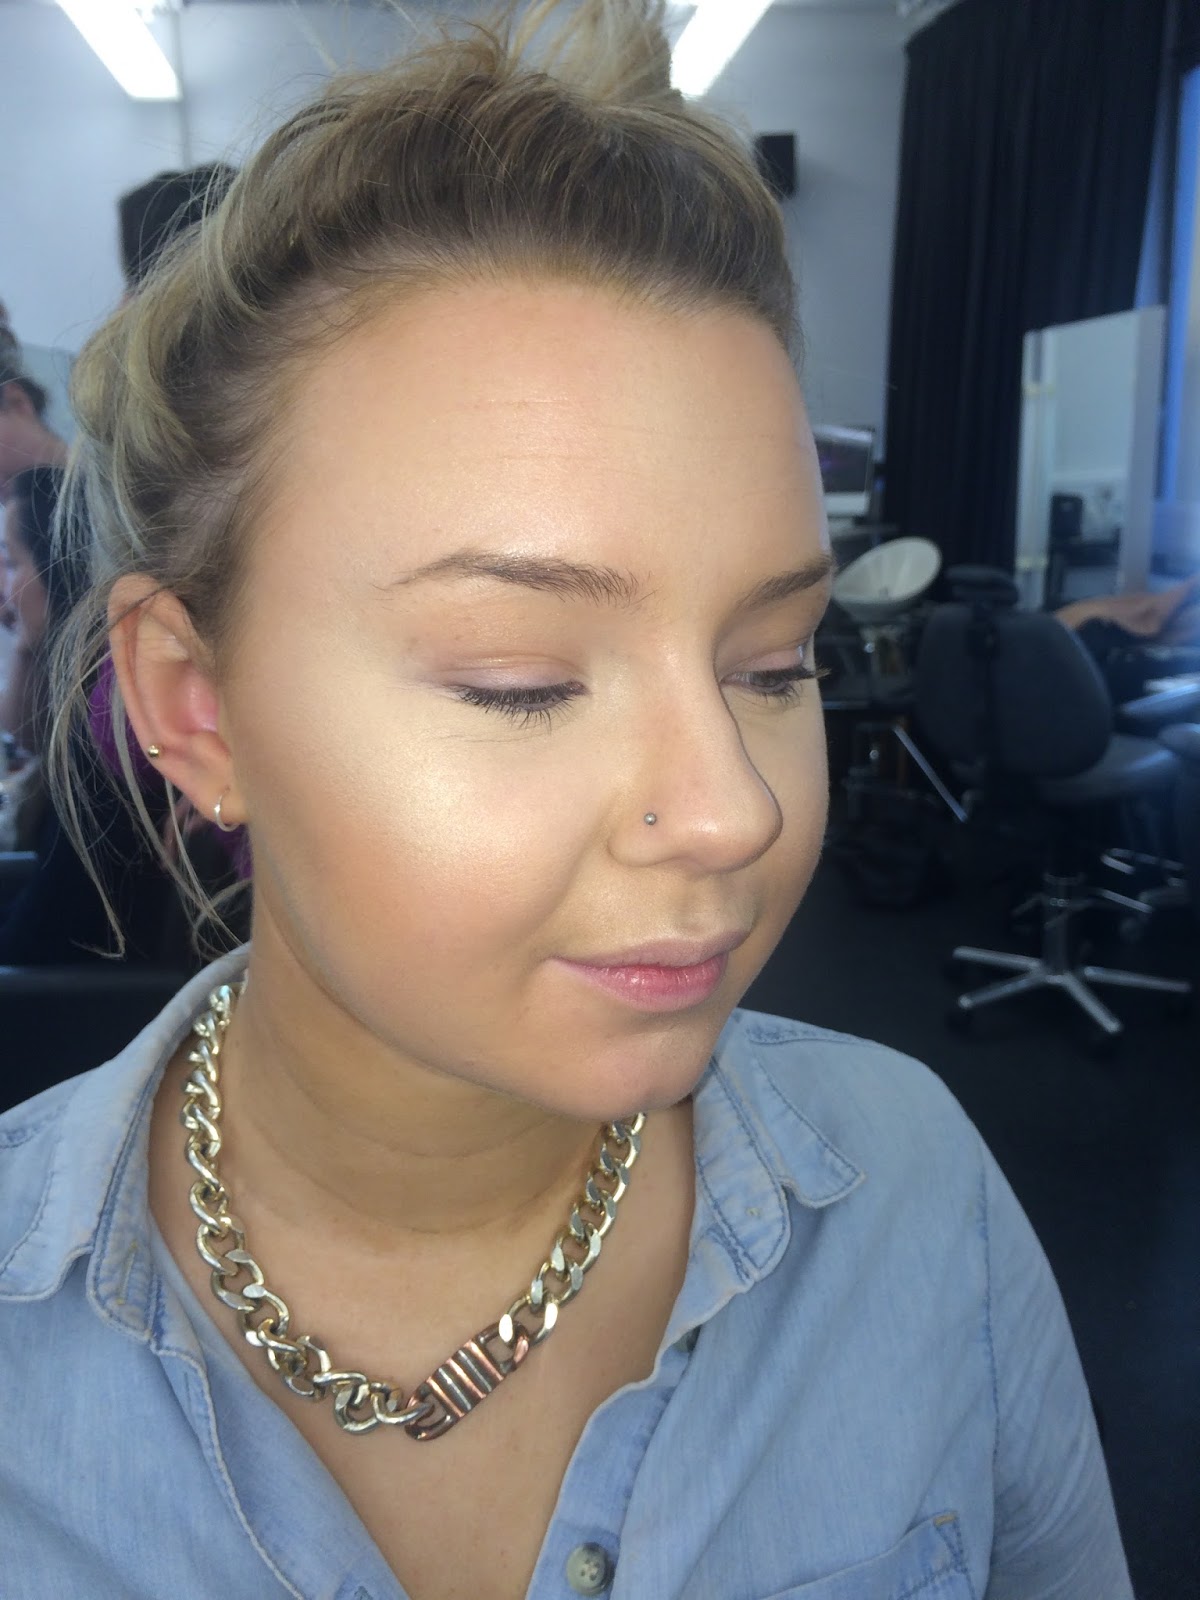
I am really happy with how this came out; however I think the concealer I used to highlight was a bit to bright because it doesn't look natural anymore. I am happy with how flawless the skin looks and how natural the contouring looks. In person the highlight on the cheeks looked too much like a straight line so I will need to work on blending it out more next time.
Matte Skin
Equipment:
-moisturiser
-primer
-foundation
-buffing brush
-concealer
-brightening concealer
-bronzer
-fluffy brush
-translucent powder
-powder
-blush
-blush brush
Step by step:
1. I first added a moisturiser to the skin and then applied a primer to make sure the skin if prepared for the makeup and to make the makeup on top last longer.
2. I next applied some foundation all over the face using a buffing brush, making sure to include the eyelids, ears and down the neck.
3. I added a concealer the same colour as the foundation to any areas of the face that need further coverage.
4. I added a brightening concealer, a couple shades lighter than the foundation underneath the eyes in a triangle shape, in the centre of the forehead, down the nose, on the Cupid's bow and on the chin. I blended this concealer out using the warmth of my fingers.
5. I put some translucent powder under the eyes to set the concealer so it wouldn't crease with a sponge and then applied some more translucent powder all over the face to mattify everything with a powder brush.
6. I applied some bronzer with a fluffy brush under the cheek bones, around the forehead and either side of the nose.
7. I applied some blush on the apples of the cheeks and backwards with a blush brush.


I am really happy with how this look came out. I like how flawless her face looks; however under her eyes still looks slightly dark so I could use colour correction to brighten then slightly. I can also see a bit of redness under her cheek contour so I could have cleaned that up slightly with concealer to give a more precise contour. Another improvement I could have made would be to contour the nose slightly more to give the appearance of a smaller nose.
No comments:
Post a Comment