Voluminous Blow Dry
-Hair dryer
-Hair grips
-Heat protectant
-Styling mousse
-Sea salt spray
-Hair clips
-Hair spray
-Wide tooth comb
-Round brush
Step by step:
1. Wash hair or make hair damp with a water spray.
2. Comb through the wet hair with a wide tooth comb, to avoid as much breakage and snapping as possible.
3. Use a hair dryer to dry about 80% of the hair.
4. Comb through the hair again quickly to get it smooth and tangle free.
5. Spray heat protector all over the mid length and ends of the hair.
6. Add some styling mousse through the mid length and ends of the hair with your fingers. Add only the remainder of mousse to the roots as it will make the roots look too greasy if too much is added. When buying styling mousses make sure they feel quite ligt and airy, as opposed to sticky and heavy as it will make it easier to style afterwards.
7. Spray sea salt all over the hair to give it some texture.
8. Dry your hands on a towel to remove any product before blow drying.
9. Make sure there is a filter on the back of the hair dryer to stop the hair being pulled into the back. Also make sure the hair dryer has a nossle so that the hot air is directed where you want it.
10. Part the hair where your client wants. Section off the crown of the head and down into a V shape towards the bottom o the hair line, altho leave about 1-2 inches of hair below the point of the V.
11. Section off the front sections, just before the ears.
12. Create a line from the top of the ear and down towards the point of the V, keeping it running parallel to the line above it.
(The bigger the brush you use the bigger the curl and the more voluminous the hair will be. Therefore the smaller the brush the smaller the curl and the less the colime created.)
13. Hold the barrel brush close to the head and lift it up, then start blow drying the roots on top and from underneath. Always start blow drying the hair from the roots first.
14. Use the hair dryer as a lever when moving the brush closer to the root so you don't have to keep picking up and putting your tools down. Start blow drying the mid lengths and ends of the hair, facing the blow dryer down the hair and lifting the brush upwards to create volume.
15. Do the mid lengths of the hair, moving the hair dryer down the hair with the brush, first and then do the ends. This is so less heat is put on the ends as they dry more quickly.
16. Wrap the hair round the barrel brush, rolling the hair in and under. Then blow the hair dryer all over the rolled hair to heat it, then twist the brush out of the hair to release the curl.
17. Pin the curl to the head to let it cool down and set.
18. Repeat these steps all over the head, making sure to add lift to each section. Do the fringe of the hair as the client wants.
19. Take all the pinned up curls out and style the hair how you want it.


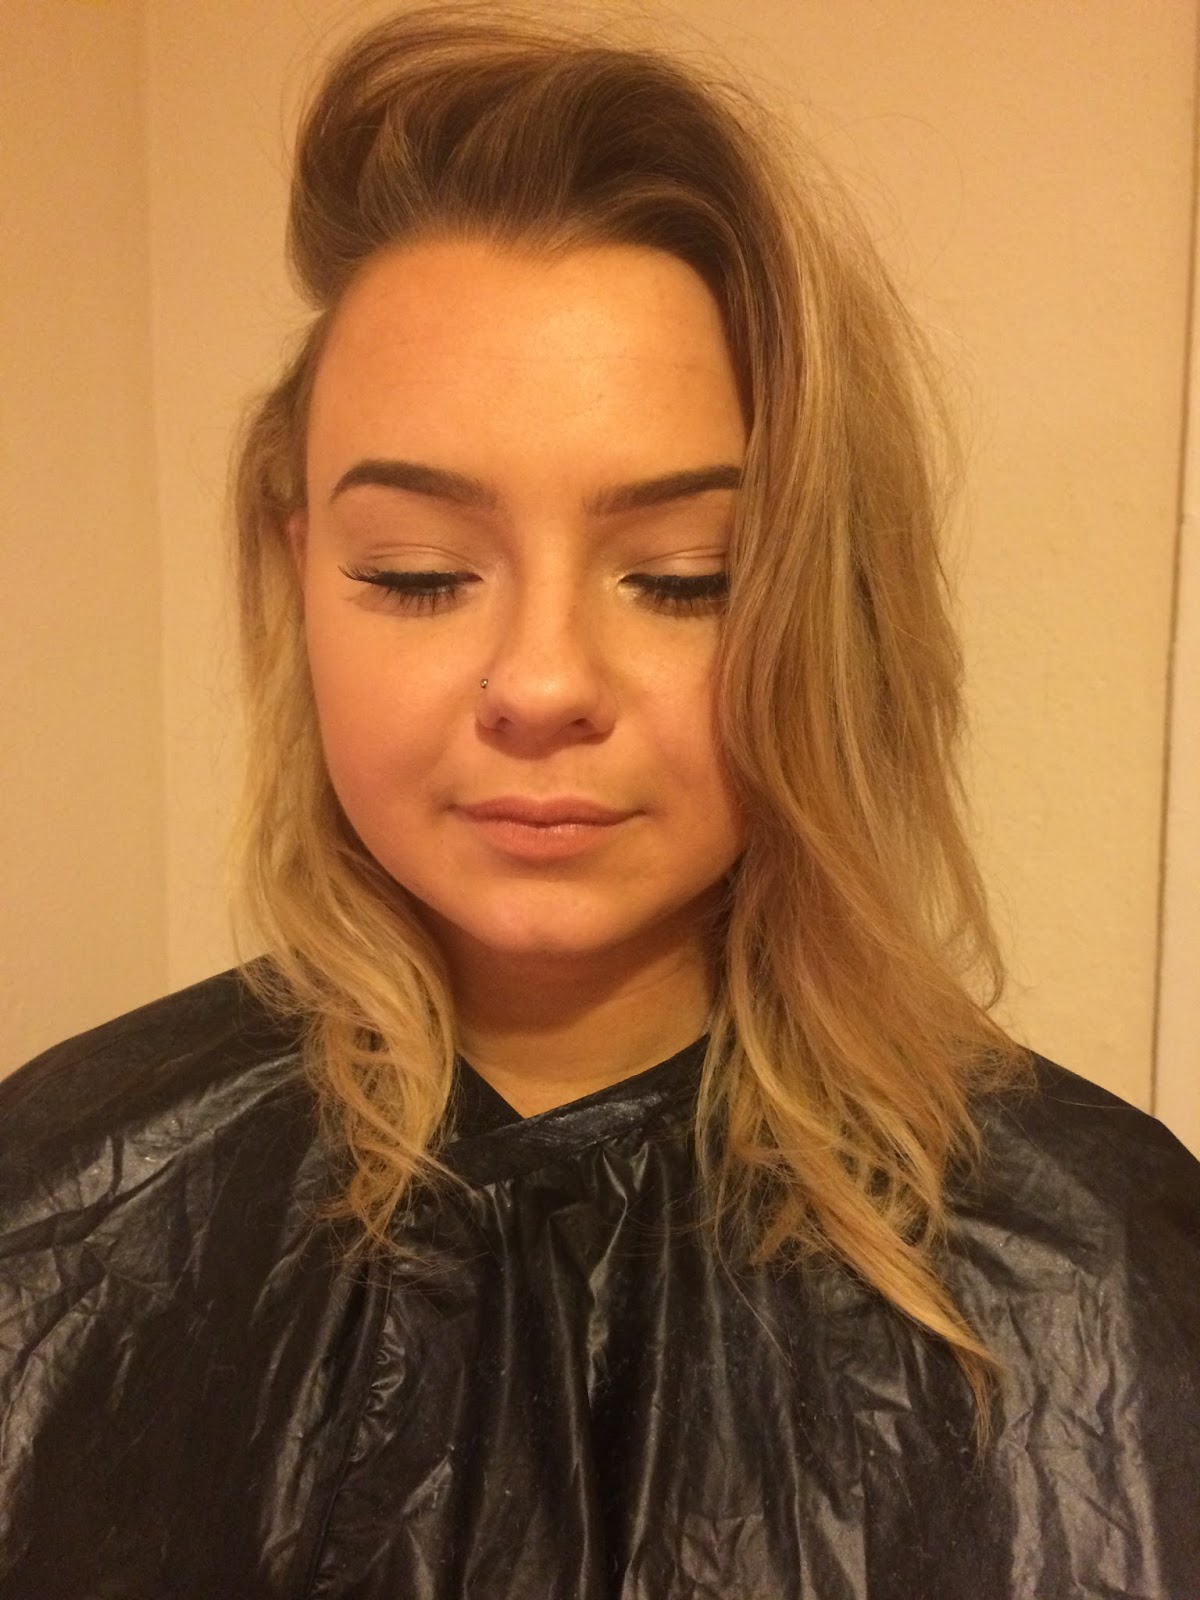
I found this hair technique really challenging. I found it difficult at first to blow dry the hair, however it got a lot easier as I continued all over the hair. I kept getting the hair tangled in the barrel brush when I tried to curl it so it made the hair look slightly knotty and when I took it out the brush I didn't find it gave me a pretty curl, but instead a matted wave. As I did more and more I began to get the hang of it, but I still found it very frustrating. When I took the curls out of the pins some of then created a really smooth curl, but some didn't work as well because they were the ones I had done first (I started at the back). I found that the curls didn't hold very well and when I lightly brushed through them with my fingers they seemed to fall out. I found this technique very time consuming and I wan't happy with the results so I will definitely just curl and back comb the hair to create this look in the future; however I did like how much lift it gave the hair at the roots.
19. Take all the pinned up curls out and style the hair how you want it.

I found this hair technique really challenging. I found it difficult at first to blow dry the hair, however it got a lot easier as I continued all over the hair. I kept getting the hair tangled in the barrel brush when I tried to curl it so it made the hair look slightly knotty and when I took it out the brush I didn't find it gave me a pretty curl, but instead a matted wave. As I did more and more I began to get the hang of it, but I still found it very frustrating. When I took the curls out of the pins some of then created a really smooth curl, but some didn't work as well because they were the ones I had done first (I started at the back). I found that the curls didn't hold very well and when I lightly brushed through them with my fingers they seemed to fall out. I found this technique very time consuming and I wan't happy with the results so I will definitely just curl and back comb the hair to create this look in the future; however I did like how much lift it gave the hair at the roots.
Slick Blow Dry
Equipment:
-Hair dryer
-Hair grips
-Heat protectant
-Styling mousse
-Sea salt spray
-Hair clips
-Hair spray
-Wide tooth comb
-Paddle brush
Step by step:
1. Wash hair or make hair damp with a water spray.
2. Comb through the wet hair with a wide tooth comb, to avoid as much breakage and snapping as possible.
3. Use a hair dryer to dry about 80% of the hair.
4. Comb through the hair again quickly to get it smooth and tangle free.
5. Spray heat protector all over the mid length and ends of the hair.
6. Add some styling mousse through the mid length and ends of the hair with your fingers. Add only the remainder of mousse to the roots as it will make the roots look too greasy if too much is added. When buying styling mousses make sure they feel quite ligt and airy, as opposed to sticky and heavy as it will make it easier to style afterwards
7. Spray sea salt all over the hair to give it some texture.
8. Dry your hands on a towel to remove any product before blow drying.
9. Make sure there is a filter on the back of the hair dryer to stop the hair being pulled into the back. Also make sure the hair dryer has a nossle so that the hot air is directed where you want it.
10. Part the hair where your client wants. Section off the crown of the head and down into a V shape towards the bottom o the hair line, altho leave about 1-2 inches of hair below the point of the V.
11. Section off the front sections, just before the ears.
12. Create a line from the top of the ear and down towards the point of the V, keeping it running parallel to the line above it.
13. Use a denim brush (or a paddle brush if the hair is longer and thick) and a blow dryer to blow dry the hair at the roots. Make sure that you get the brush in close to the head and pull it upwards to create some lift at the root.
14. After the roots are dry, move down the hair to the mid lengths and then finish off with the ends. This technique won't create as much volume, but try to keep it as smooth and slick looking as possible.
15. You can direct the hair towards or away from the face nearer the front to shape the face.


I found this style of blow drying a lot easier, probably because I had already practiced in the hair style above, but also because I didn't have to worry about creating a curl with the barrel brush. I found I was able to get my hands in the right place to make the holding of the blow dryer, brush and hair easier. I found I was able to do this hair style quite quickly and I am happy with how straight the hair looks. However, I didn't achieve as much volume at the root as I would have liked. If I were to do this again I would add some shine spray or smoothing product over the hair to make it look more glossy and I would have lifted the hair further up when blow drying it to give more volume at the root.
No comments:
Post a Comment