Saturday, 30 January 2016

Mac's Logo and Identity

Mac Logo

Mac Cosmetics Company Logo
MAC, 2016. Our History [viewed 30th January 2016]. 
Available from: http://www.maccosmetics.jobs/mac/our-history.html
The Mac logo is very distinctive and recognisable. It is very simplistic, with veery clean and sharp edges, making it look very professional. The use of only black and white also gives a professional and up market look because it doesn't look fussy or tacky in any way. The logo doesn't include any images of makeup or any other figures, but it instead just includes the company name. It has a very distinctive font used, that is used every time the logo is used for consistency. There are two dots between the letters to show that the letters are initials for Makeup Art Cosmetics. It could be argued that the two dots look like eyes, which could be interpreted as beauty being in the eye of the beholder.

Mac's Identity
Mac's identity is all about self expression, individuality and creativity through makeup and self presentation. It is all about being exactly who you want to be and not hiding behind stereotypes or what people expect you to be like. Mac is also all about being confident and free within yourself and your makeup skills. Mac was originally launched because of the limited colours at the time and the co-founders wanted to create products that makeup artists could use to create vibrant and colourful looks for photography. All the celebrities they use are very creative and are looked up to because of their confidence to start new movements and create their own identity. 

Photography - Light Meters

In today's lesson we learnt all about light meters and how to use them. A light meter is a device that the photographer can place next to the object that they are shooting to work out what aperture will give them the correct exposure for that particular object. My group used a beauty dish as a light source to experiment with because it is a harsher light than a soft box so that we could see more shadows, however it isn't as harsh as a spill kill. 

How to use a Light Meter:
1. Turn it on by pressing the Power button.
2. Hold the ISO button to get 100.
3. Click the Mode button until you find a lightening symbol with a C.
4. Make sure the slider (white dome) is closed.
5. Plug the sync lead into the light meter.
6. Hold the light meter next to the model, with the white dome facing towards the light, and press the button on the side. 
7. Read the number on the bottom right of the screen to see what aperture should be used to give the correct exposure for the model's positioning.

The aperture, preferably, needs to be either f/5.6 or f/8. If the aperture if too low, but you don't want to change the model's positioning, then you can make the power knob on the light up to give you a bigger aperture. This also means that if the aperture is higher than f/8 then you need to turn the power knob down until the light meter gives an aperture of f/8. However you may not always want to have the correct exposure in your image, for example, if you want to achieve a very bright, over exposed image then you would not follow these rules. You can use gaffe tape to mark where the model is standing so that you know that the model will stay in the same place as when you first used the light meter. 
Light meter
SOPHIE, 2015. Best Light Meter For Digital Photography [viewed 30th January 2016]. 
Available from: http://tipsfordigitalphotography.com/best-light-meter-for-digital-photography/

Light Meter and Reflector Experiments
In the experiments below we tested out what effect different reflectors had and what would happen if we bounced the light backwards onto the model. We also used a light reflector on each image to make sure we used the correct exposure.

The image above shows the model with a beauty dish directly in front of her, with no reflectors. We used a light meter to obtain a reading of f/8 and had to change the the power of the light accordingly. The beauty dish was placed slightly above the model, so there are very harsh shadows underneath anything sticking out, for example, the model's chin. 

In this image we used the same lighting set up but we held a reflector under the model's chin to soften any shadows, like the one under the chin. I think that this would have been more effective if the camera was more zoomed in because the reflector would have been able to get closer to the model's face and therefore bounce more light directly onto it. 

In this image was faced the beauty dish light directly onto the model's face instead of bouncing the light backwards. This diffused the light and gave a softer effect. We also used a reflector under the model's chin to make the shadows less harsh and therefore more flattering. 

In the image above we faced the beauty dish light directly onto the model's face instead of bouncing the light backwards. We did not use a reflector under the model's chin so the shadows are quite harsh, but we instead used two white mount boards on either side to help brighten the sides of the model and therefore give an overall brighter look. This looks very subtle, but I can see that it has taken away some of the shadows under the cheekbones, making the model's face look more flat and lifeless. 

In this final image we directed the beauty dish light directly onto the model's face instead of bouncing the light backwards. We then used a white reflector to reflect light upwards to soften any shadows and we used the two white mount boards either side of the model to reflect light onto her sides. This made the image a lot brighter, however I think we must have forgotten to use the light meter in this image because it looks very over exposed and therefore washed out. This has made me very aware of the importance of using a light meter to help with the image exposure because it ensures that the image won't come out over or under exposed. 

Mac's Target Audience

A target market is the group of consumers that are most likely to by your products and the group of consumers that the products are catered to.


Mac was originally created for professional makeup artists that needed makeup to translate well on camera and with stand any vigorous wear by models; however the company now caters to a wider range of needs and is not just for professional use anymore, but also available to the general public. Mac's mission statement is All Ages, All Sexes, All Races which indicates that everyone is including in Mac's target audience. Mac are so famous for supporting people's individuality and self expression, not matter what age, sex or race you are. The company have done adverts using models with a variety of races, models aged from about 18 upwards and both males and females. Some example of the variety of models used are shown below.

Ru Pal, Famous Drag Queen.
FERBER, T., 2015. These Celebrity Viva Glam Ads You Forgot About Are Works of Art [viewed 30th January 2016]. Available from: http://www.vh1.com/news/217765/celebrity-mac-cosmetics-viva-glam-aids-hiv-ads-photos/
Sharon Osbourne, Aged 61.
FASHION&STYLE, 2015. Will Kelly Osbourne and Sharon Osbourne's MAC Collaboration Be As Popular As Rihanna's? Could Anything Beat 'RiRi Hearts MAC'? [viewed 30th January 2016]. Available from: http://www.fashionnstyle.com/articles/17063/20140306/kelly-osbourne-sharon-osbourne-mac-collaboration-rihanna-could-anything-beat-riri-hearts-mac.htm
A model with colour.
BEAUTYPULSELONDON, 2014. New Season #brownbeauty! A review of the AW16 campaigns: Part 3! The Beauty Set! 

[viewed 30th January 2016]. Available from: http://beautypulselondon.com/new-season-brownbeauty-a-
review-of-the-aw14-campaigns-part-3-the-beauty-set/
Female body builder.
SAUERS, J., 2013. MAC Put A Female Bodybuilder In A Makeup Ad And It's Beautiful [viewed 30th January 2016]. Available from: http://jezebel.com/5973202/mac-put-a-female-bodybuilder-in-a-makeup-ad-and-its-beautiful
Iris Apfel, older and more eccentric model.
SNAP FASHION, 2011. Iris Apfel + MAC [viewed 30th January 2016]. 
Available from: https://snapfashion.wordpress.com/category/celebrity-spot/page/25/
The majority of their consumers are female and they are one of two brackets. They are either women who have a family and have launched their careers or college students in their teens. The consumers are also usually confident, creative and savvy and they like to spend money on themselves. Mac is a high end brand, but it is not at a very high price point, such as Chanel or Tom Ford etc. so it is more attainable by the general public, even if it is a treat. Mac uses demographic information which informs them that their more concentrated target audience is women between the ages of 18 - 49.

Resources:
QUAATEY, S. M.A.C Cosmetics: The World's Leading Makeup Company [viewed 30th January 2016]. Available from: http://makeupartcosmeticsinc.blogspot.co.uk

LADYRATTUS, 2012. A Case Study on MAC Cosmetics: The World's Leading Makeup Company [viewed 30th January 2016]. Available from: http://www.ladyrattus.com/2012/12/a-case-study-on-mac-cosmetics-worlds.html

History and Ethical and Social Responsibilities of MAC

I chose MAC as my brand because I have used and enjoyed their products for many years, I love how the creative and abstract some of their advertisements can be, and I support the work they do for charity. I didn't want to limit myself to a brand that has a very distinctive look, but I wanted to choose a brand that I can have fun with and be creative.
Mac Cosmetics Company Logo
MAC, 2016. Our History [viewed 30th January 2016]. 
Available from: http://www.maccosmetics.jobs/mac/our-history.html
Company History
Mac cosmetics was cofounded in Toronto by makeup artist and photographer, Frank Toskan, and beauty salon owner, Frank Angelo. They wanted to create a new line of makeup that would specifically work well with photography, as they thought there was a gap in the market for this. They initially started by selling products that they had 'cooked up' in their kitchen in the hair salon and this quickly got fellow makeup artists and hair stylists interest. Their success grew and grew by word of mouth until stylists and editors started using and promoting the new brand which only expanded their success even more until in 1984 they launched their first counter in a department store in Toronto.

The makeup counter was only staffed with professional makeup artists, which hadn't been done before, making the brand stand out from the rest. Mac decided to fully train and educate their staff about the products, an industry innovation. Mac didn't rely on advertising, handing out samples or promotions, they instead replied on the quality of their products for continuous sales. The packaging caught people's eyes because it was very chic and clean looking, and pots were used instead of the usual compacts. Other popular brands at that time were focusing more on skin care, whereas Mac wanted to focus on the makeup products to become the 'ultimate colour authority'. The most popular product was the intense matte red lip stick. Madonna, a New York cabaret star, wore it for a photo shoot which brought a lot of interest and she was later seen wearing a t-shirt with Mac written on it which, again, drew more attention to the brand. The company wanted to mix 'street savvy with glamorous style and panache', but they wanted to support people's individuality and self expression as a priority. This new creative take on makeup introduced a lot of drag and theatrical makeup into the mac stores and counters.

Mac's growing success did not go unnoticed by the cosmetic industry and so in 1995 The Estee Lauder Companies, one of the world's leading manufacturers of makeup, skin care, fragrance and hair care products, bought a percentage of Mac which greatly expanded the company to distribute their products across the globe. Stand alone stores and Mac counters in leading department stores starting opening at record pace until the company became very well known and respected and Mac teams started working with international fashion collections. In 1998 Estee Lauder purchased the remaining shares of Mac and John Demsey became the president of Mac. Mr Demsey pushed for the company to work at film festivals worldwide and sponsor certain pop music concert tours to help support the HIV/AIDS fund, and he strengthened the link between beauty, fashion and culture to keep the brand very relevant and edgy. The company continues to produce quality products, satisfy their customers and grow worldwide. The products that Mac create and bring out are because of the demand from professional makeup artists, which are Mac's ultimate target audience. The company has also continues the HIV/AIDS fund, but the company also supports animal-free testing and has a recycling program called Back To Mac.


HIV/AIDS Fund 
In 1994, when AIDS started spreading across the globe, the MAC AIDS Fund was created. It was put in place by Mac's co-founders to raise awareness and money to help battle against AIDS and any charity fund raising done by the company would go to AID charities. This fund raising started with the VIVA GLAM lipstick and 100% of the proceeds of every VIVA GLAM product went to the MAC AIDS fund. VIVA GLAM wanted to 'celebrate life and the outspoken attitude of the company'. The company's mission statement of 'all ages, all sexes, all races' supported this AIDS fund as it would help men, women and children suffering from the illness. VIVA GLAM has been supported by many trend setting and outspoken celebrities over the years, including Lady Gaga, Ru Pal and Miley Cyrus. The spokespeople chosen bring out their own VIVA GLAM products to support the cause and they have to be influential, showcase diverse communities, and alternative as they need to be people that are looked up to for their personal achievements and creating new movements. Through this HIV/AidS fund Mac have raised $224 million to date. Some examples of VIVA GLAM adverts are shown below.
VIVA GLAM I, Ru Pal
SWATCH & REVIEW, 2014. MAC Viva Glam over the Year [viewed 30th January 2016]. 
Available from: http://swatchandreview.com/mac-viva-glam-over-the-years/
VIVA GLAM V, Campaign 2, Pamela Anderson
SWATCH & REVIEW, 2014. MAC Viva Glam over the Year [viewed 30th January 2016]. 
Available from: http://swatchandreview.com/mac-viva-glam-over-the-years/
VIVA GLAM RICKY AND NICKI, Ricky Martin and Nicki Minaj
DUMAS, D., 2011. Lippin' La Vida Loca: First look at Nicki Minaj and Ricky Martin's MAC Viva Glam lipstick campaign [viewed 30th January 2016]. Available from: http://www.dailymail.co.uk/femail/article-2062969/First-look-Nicki-Minaj-Ricky-Martins-MAC-Viva-Glam-lipstick-campaign.html
VIVA GLAM MILEY, Miley Cyrus
CRUEL, J., 2014. Miley Cyrus Is the New Face of MAC Viva Glam [viewed 30th January 2016]. 
Available from: http://www.popsugar.co.uk/beauty/Miley-Cyrus-New-Face-MAC-Viva-Glam-36022132#photo-36022132
In 2002 Mac began to offer 'Good Spirits' makeovers where Mac makeup artists would give free Mac makeovers to people suffering with HIV/AIDS to help them learn about makeup and how to make themselves look and feel beautiful, even when they suffer from such an illness.

Mac cosmetics also supports HIV/AIDS with the program Kids Helping Kids where children affected by HIV/AIDS design and create greetings cards which Mac sell, and all the proceeds go to men, women and children affected by HIV/AIDS. Examples of the cards are shown below.
Greeting cards made by children affected by HIV/AIDS.
MARTA, 2007. MAC Holiday Kids Helping Kids, 2007 [viewed 30th January 2016]. 
Available from: http://talkingmakeup.com/tag/mac/page/22/

Back to Mac Recycling Program
Mac cosmetics have a recycling program called Back To Mac to help the environment, where you can return six primary packaging containers to a Mac counter, store or online and you will receive a free Mac lipstick of your choice.


Resources:
MAC, 2016. Back-To-Mac [viewed 30th January 2016]. Available from: https://www.maccosmetics.com/giving_back/back_to_mac.tmpl

MAC, 2016. Campaign History [viewed 30th January 2016]. Available from: http://www.macaidsfund.org/theglam/campaignhistory

MAC, 2016. Our History [viewed 30th January 2016]. Available from: http://www.maccosmetics.jobs/mac/our-history.html

Thursday, 28 January 2016

Blowing Drying Hair

Voluminous Blow Dry

Equipment:
-Hair dryer
-Hair grips 
-Heat protectant 
-Styling mousse
-Sea salt spray
-Hair clips
-Hair spray
-Wide tooth comb
-Round brush

Step by step:
1. Wash hair or make hair damp with a water spray.
2. Comb through the wet hair with a wide tooth comb, to avoid as much breakage and snapping as possible.
3. Use a hair dryer to dry about 80% of the hair.
4. Comb through the hair again quickly to get it smooth and tangle free.
5. Spray heat protector all over the mid length and ends of the hair.
6. Add some styling mousse through the mid length and ends of the hair with your fingers. Add only the remainder of mousse to the roots as it will make the roots look too greasy if too much is added. When buying styling mousses make sure they feel quite ligt and airy, as opposed to sticky and heavy as it will make it easier to style afterwards. 
7. Spray sea salt all over the hair to give it some texture.
8. Dry your hands on a towel to remove any product before blow drying. 
9. Make sure there is a filter on the back of the hair dryer to stop the hair being pulled into the back. Also make sure the hair dryer has a nossle so that the hot air is directed where you want it.
10. Part the hair where your client wants. Section off the crown of the head and down into a V shape towards the bottom o the hair line, altho leave about 1-2 inches of hair below the point of the V. 
11. Section off the front sections, just before the ears.
12. Create a line from the top of the ear and down towards the point of the V, keeping it running parallel to the line above it.
(The bigger the brush you use the bigger the curl and the more voluminous the hair will be. Therefore the smaller the brush the smaller the curl and the less the colime created.)
13. Hold the barrel brush close to the head and lift it up, then start blow drying the roots on top and from underneath. Always start blow drying the hair from the roots first. 
14. Use the hair dryer as a lever when moving the brush closer to the root so you don't have to keep picking up and putting your tools down. Start blow drying the mid lengths and ends of the hair, facing the blow dryer down the hair and lifting the brush upwards to create volume. 
15. Do the mid lengths of the hair, moving the hair dryer down the hair with the brush, first and then do the ends. This is so less heat is put on the ends as they dry more quickly. 
16. Wrap the hair round the barrel brush, rolling the hair in and under. Then blow the hair dryer all over the rolled hair to heat it, then twist the brush out of the hair to release the curl. 
17. Pin the curl to the head to let it cool down and set. 
18. Repeat these steps all over the head, making sure to add lift to each section. Do the fringe of the hair as the client wants.
19. Take all the pinned up curls out and style the hair how you want it.


I found this hair technique really challenging. I found it difficult at first to blow dry the hair, however it got a lot easier as I continued all over the hair. I kept getting the hair tangled in the barrel brush when I tried to curl it so it made the hair look slightly knotty and when I took it out the brush I didn't find it gave me a pretty curl, but instead a matted wave. As I did more and more I began to get the hang of it, but I still found it very frustrating. When I took the curls out of the pins some of then created a really smooth curl, but some didn't work as well because they were the ones I had done first (I started at the back). I found that the curls didn't hold very well and when I lightly brushed through them with my fingers they seemed to fall out. I found this technique very time consuming and I wan't happy with the results so I will definitely just curl and back comb the hair to create this look in the future; however I did like how much lift it gave the hair at the roots.

Slick Blow Dry

Equipment:
-Hair dryer
-Hair grips 
-Heat protectant 
-Styling mousse
-Sea salt spray
-Hair clips
-Hair spray
-Wide tooth comb
-Paddle brush

Step by step:
1. Wash hair or make hair damp with a water spray.
2. Comb through the wet hair with a wide tooth comb, to avoid as much breakage and snapping as possible.
3. Use a hair dryer to dry about 80% of the hair.
4. Comb through the hair again quickly to get it smooth and tangle free.
5. Spray heat protector all over the mid length and ends of the hair.
6. Add some styling mousse through the mid length and ends of the hair with your fingers. Add only the remainder of mousse to the roots as it will make the roots look too greasy if too much is added. When buying styling mousses make sure they feel quite ligt and airy, as opposed to sticky and heavy as it will make it easier to style afterwards
7. Spray sea salt all over the hair to give it some texture.
8. Dry your hands on a towel to remove any product before blow drying. 
9. Make sure there is a filter on the back of the hair dryer to stop the hair being pulled into the back. Also make sure the hair dryer has a nossle so that the hot air is directed where you want it.
10. Part the hair where your client wants. Section off the crown of the head and down into a V shape towards the bottom o the hair line, altho leave about 1-2 inches of hair below the point of the V. 
11. Section off the front sections, just before the ears.
12. Create a line from the top of the ear and down towards the point of the V, keeping it running parallel to the line above it.
13. Use a denim brush (or a paddle brush if the hair is longer and thick) and a blow dryer to blow dry the hair at the roots. Make sure that you get the brush in close to the head and pull it upwards to create some lift at the root. 
14. After the roots are dry, move down the hair to the mid lengths and then finish off with the ends. This technique won't create as much volume, but try to keep it as smooth and slick looking as possible. 
15. You can direct the hair towards or away from the face nearer the front to shape the face. 


I found this style of blow drying a lot easier, probably because I had already practiced in the hair style above, but also because I didn't have to worry about creating a curl with the barrel brush. I found I was able to get my hands in the right place to make the holding of the blow dryer, brush and hair easier. I found I was able to do this hair style quite quickly and I am happy with how straight the hair looks. However, I didn't achieve as much volume at the root as I would have liked. If I were to do this again I would add some shine spray or smoothing product over the hair to make it look more glossy and I would have lifted the hair further up when blow drying it to give more volume at the root. 

Matte and Dewy Bases

Dewy Skin

Equipment:
-moisturiser
-hydrating primer
-illuminater
-foundation
-buffing brush
-concealer
-brightening concealer
-cream highlighter
-powder highlighter 
-highlighter brush
-bronzer
-fluffy brush
-translucent powder
-powder brush

Step by step:
1. I first added a hydrating moisturiser to the skin and then added a hydrating primer to make sure the skin if prepared for the makeup.
2. I then added an illuminater to the top of the cheek bones, on the centre of the forehead, down the bridge of the nose, on the Cupid's bow and in the centre of the chin so that these areas have a 'glowing from within' look.
3. I mixed the foundation with the illuminater and applied a light layer of this all over the face, including the eyelids and down the neck. I used a buffing brush to do this.
4. I added a concealer the same colour as the foundation to any areas of the face  that need further coverage. 
5. I added a brightening concealer, a couple shades lighter than the foundation underneath the eyes in a triangle shape, in the centre of the forehead, down the nose, on the Cupid's bow and on the chin. I blended this concealer out using the warmth of my fingers.
6. I put a small amount of translucent powder under the eyes to set the concealer so it wouldn't crease. I also applied some powder to any areas of the face I didn't want to look dewy, like either side of the nose and the sides of the mouth etc.
7. I applied a cream highlight to any of the areas I added the illuminater to give them a glossy finish. 
8. I went over that highlight with a powder highlight to make it even more intense.
9. I added some bronzing powder under the cheek bones, round the forehead and either side of the nose to make the skin look more bronzy and contoured. 


I am really happy with how this came out; however I think the concealer I used to highlight was a bit to bright because it doesn't look natural anymore. I am happy with how flawless the skin looks and how natural the contouring looks. In person the highlight on the cheeks looked too much like a straight line so I will need to work on blending it out more next time. 

Matte Skin

Equipment:
-moisturiser
-primer
-foundation
-buffing brush
-concealer
-brightening concealer
-bronzer
-fluffy brush
-translucent powder
-powder
-blush
-blush brush

Step by step:
1. I first added a moisturiser to the skin and then applied a primer to make sure the skin if prepared for the makeup and to make the makeup on top last longer.
2. I next applied some foundation all over the face using a buffing brush, making sure to include the eyelids, ears and down the neck.
3. I added a concealer the same colour as the foundation to any areas of the face  that need further coverage. 
4. I added a brightening concealer, a couple shades lighter than the foundation underneath the eyes in a triangle shape, in the centre of the forehead, down the nose, on the Cupid's bow and on the chin. I blended this concealer out using the warmth of my fingers.
5. I put some translucent powder under the eyes to set the concealer so it wouldn't crease with a sponge and then applied some more translucent powder all over the face to mattify everything with a powder brush.
6. I applied some bronzer with a fluffy brush under the cheek bones, around the forehead and either side of the nose.
7. I applied some blush on the apples of the cheeks and backwards with a blush brush. 


I am really happy with how this look came out. I like how flawless her face looks; however under her eyes still looks slightly dark so I could use colour correction to brighten then slightly. I can also see a bit of redness under her cheek contour so I could have cleaned that up slightly with concealer to give a more precise contour. Another improvement I could have made would be to contour the nose slightly more to give the appearance of a smaller nose. 

Wednesday, 27 January 2016

1960s Makeup and Hair

Makeup

Equipment:
-Moisturiser
-Primer
-Foundation
-Buffing brush
-Light/medium brown eye shadow
-Small angled brush
-Disposable mascara wand
-Eye shadow primer
-Translucent powder
-Small detail brush
-Black, dark brown, medium brown eye shadows
-Pencil brush
-Small fluffy brush
-Light blue eye shadow
-Flat brush
-Black eye liner
-Black mascara
-Duo lash glue
-Fake eye lashes
-Concealer
-Fluffy concealer brush
-Fluffy brush
-Powder brush
-Blush palette
-Blush brush
-Lip palette
-Lip brush

Step by step:
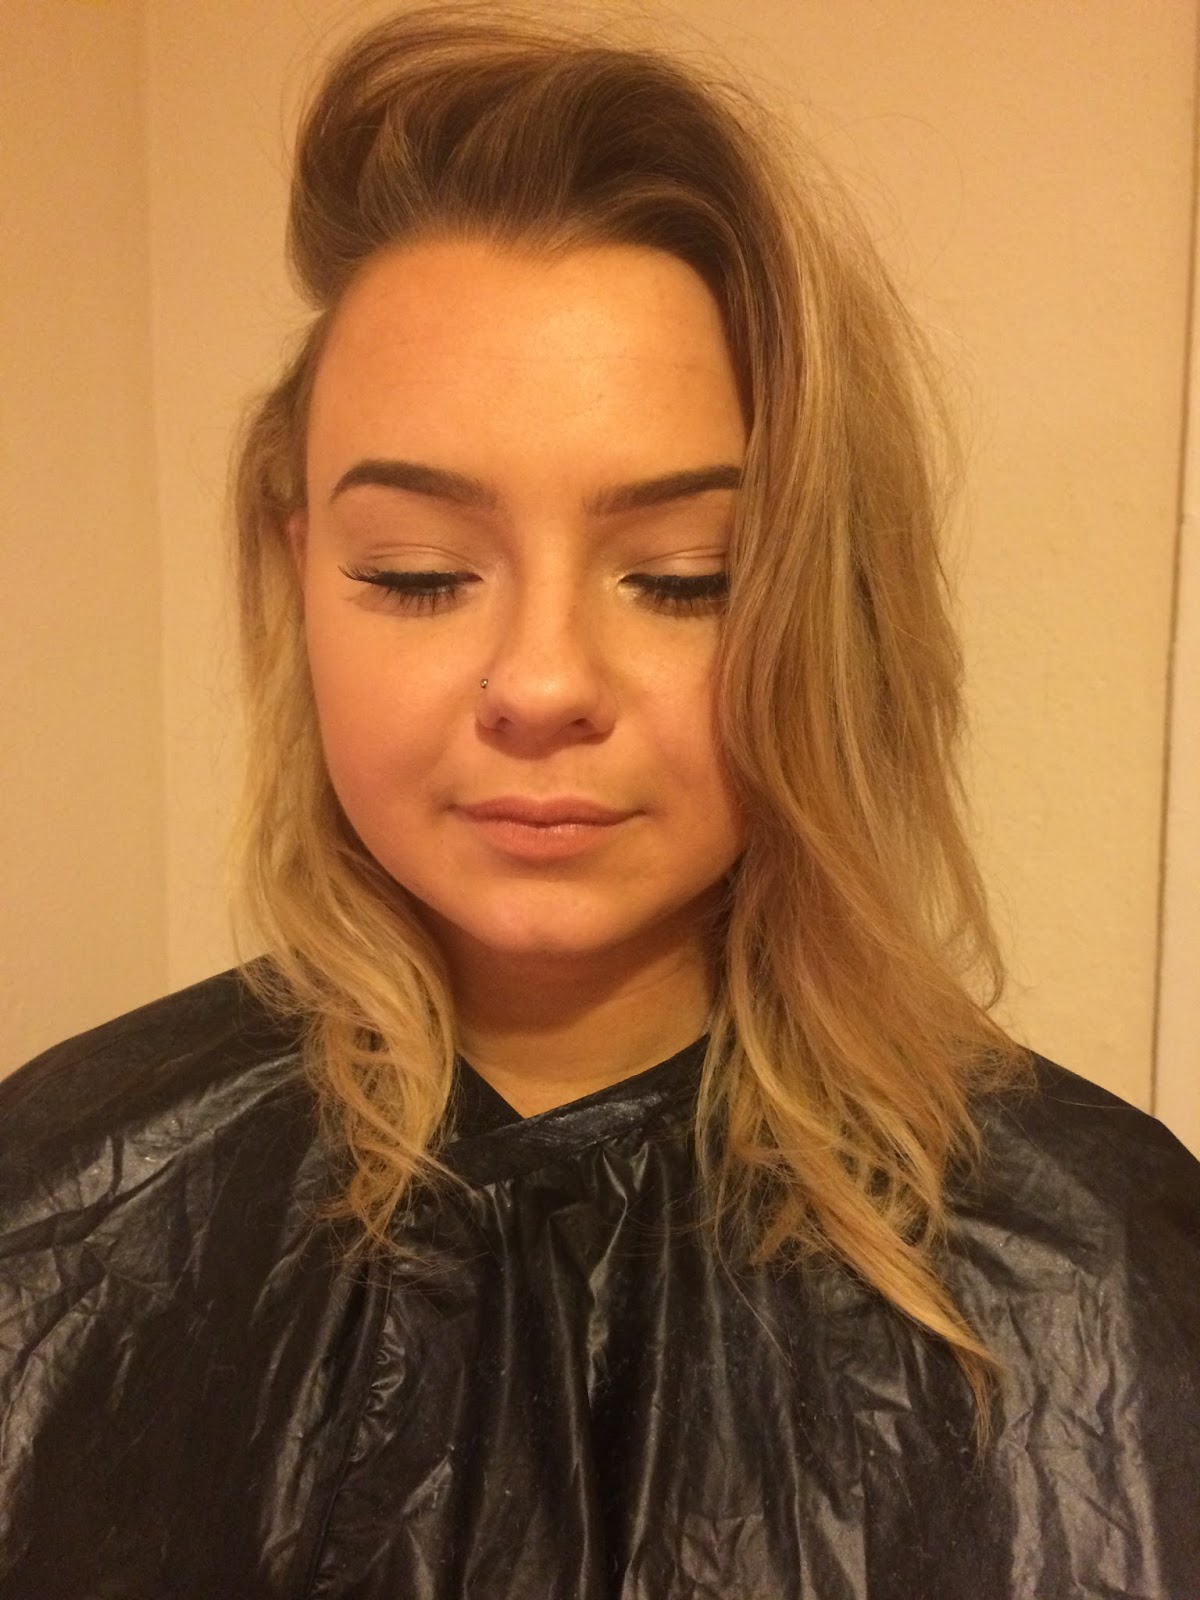
1. I first moisturised and primed the skin to prepare the skin for makeup application.
2. I applied foundation all over the face, to match her neck, with a buffing brush to make her skin look as flawless as possible. I made sure to blend this onto the ears, down the neck and into the hair line.
3. I next took some light brown eye shadow and a small angled brush and filled in her eye brows to give them a more prominent shape. I brushed them out with a disposable mascara wand to give them a slightly softer look.
4. I used an eye shadow primer all over her eye lids and under neath her eyes so that the eye shadow would last all day and I then set this with some powder.
5. Using a small detail brush, I stencilled out my cut crease line on each eye with some dark brown eye shadow, just above the natural crease line.
6. I then took a pencil brush and some dark brown eye shadow to blend this line up slightly, making sure not to blend below the line.
7. Next, taking a small fluffy brush and a lighter brown eye shadow, I blended this line out slightly more to make it look seamless.
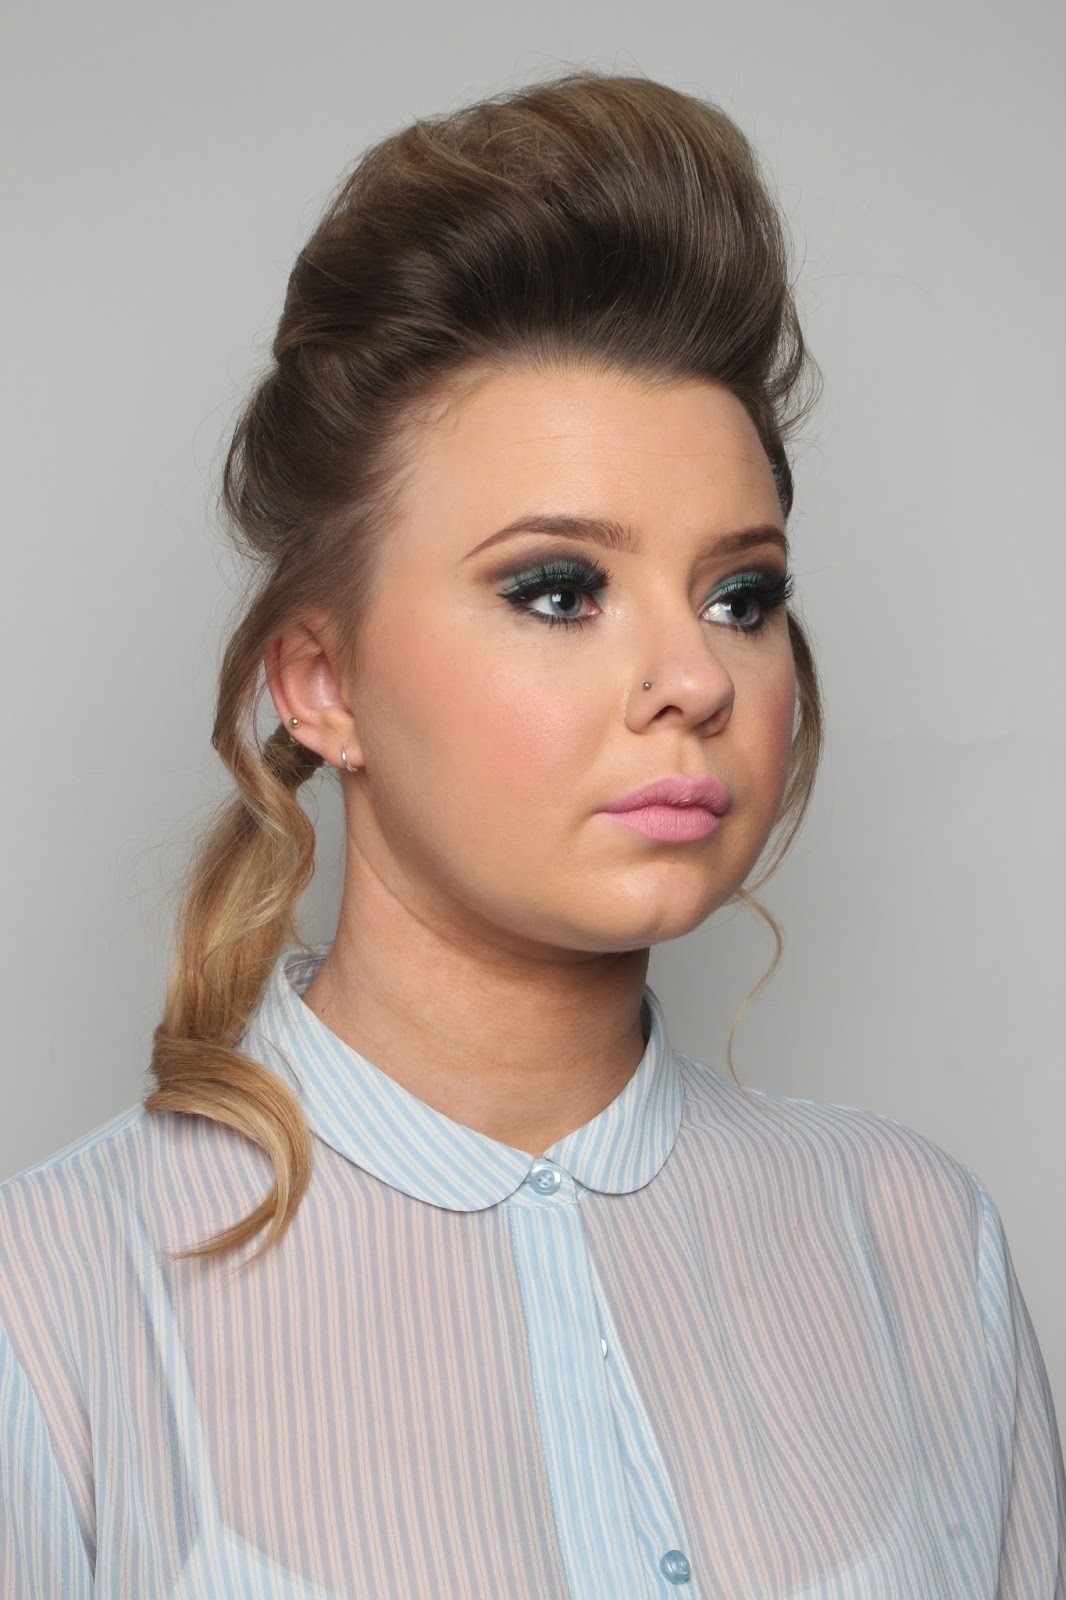
8. I then repeated these steps again, but started with black eye shadow to carve out the cut crease. I continued these steps until the eye shadow was dark and blended enough.
9. I took a bright light blue eye shadow and applied it all over the eye lids with my finger. When I got closer to the cut crease, I cleaned up the line further using a small flat brush.
10. I applied a thin line of black eye liner along the upper lash line and created a very small wing on both sides to give the eyes more of a cat eye look.
11. I took the small detail brush and some black eye shadow and shaded the outer third slightly to balance out the darker upper lash line. I then blended this out with some lighter brown and brought it further in.
12. I applied black mascara to the top and bottom eye lashes, adding more the bottom lashes.
13. I applied some duo lash glue to some dramatic fake eye lashes and applied them to the top lash line to make the eyes look more intense.
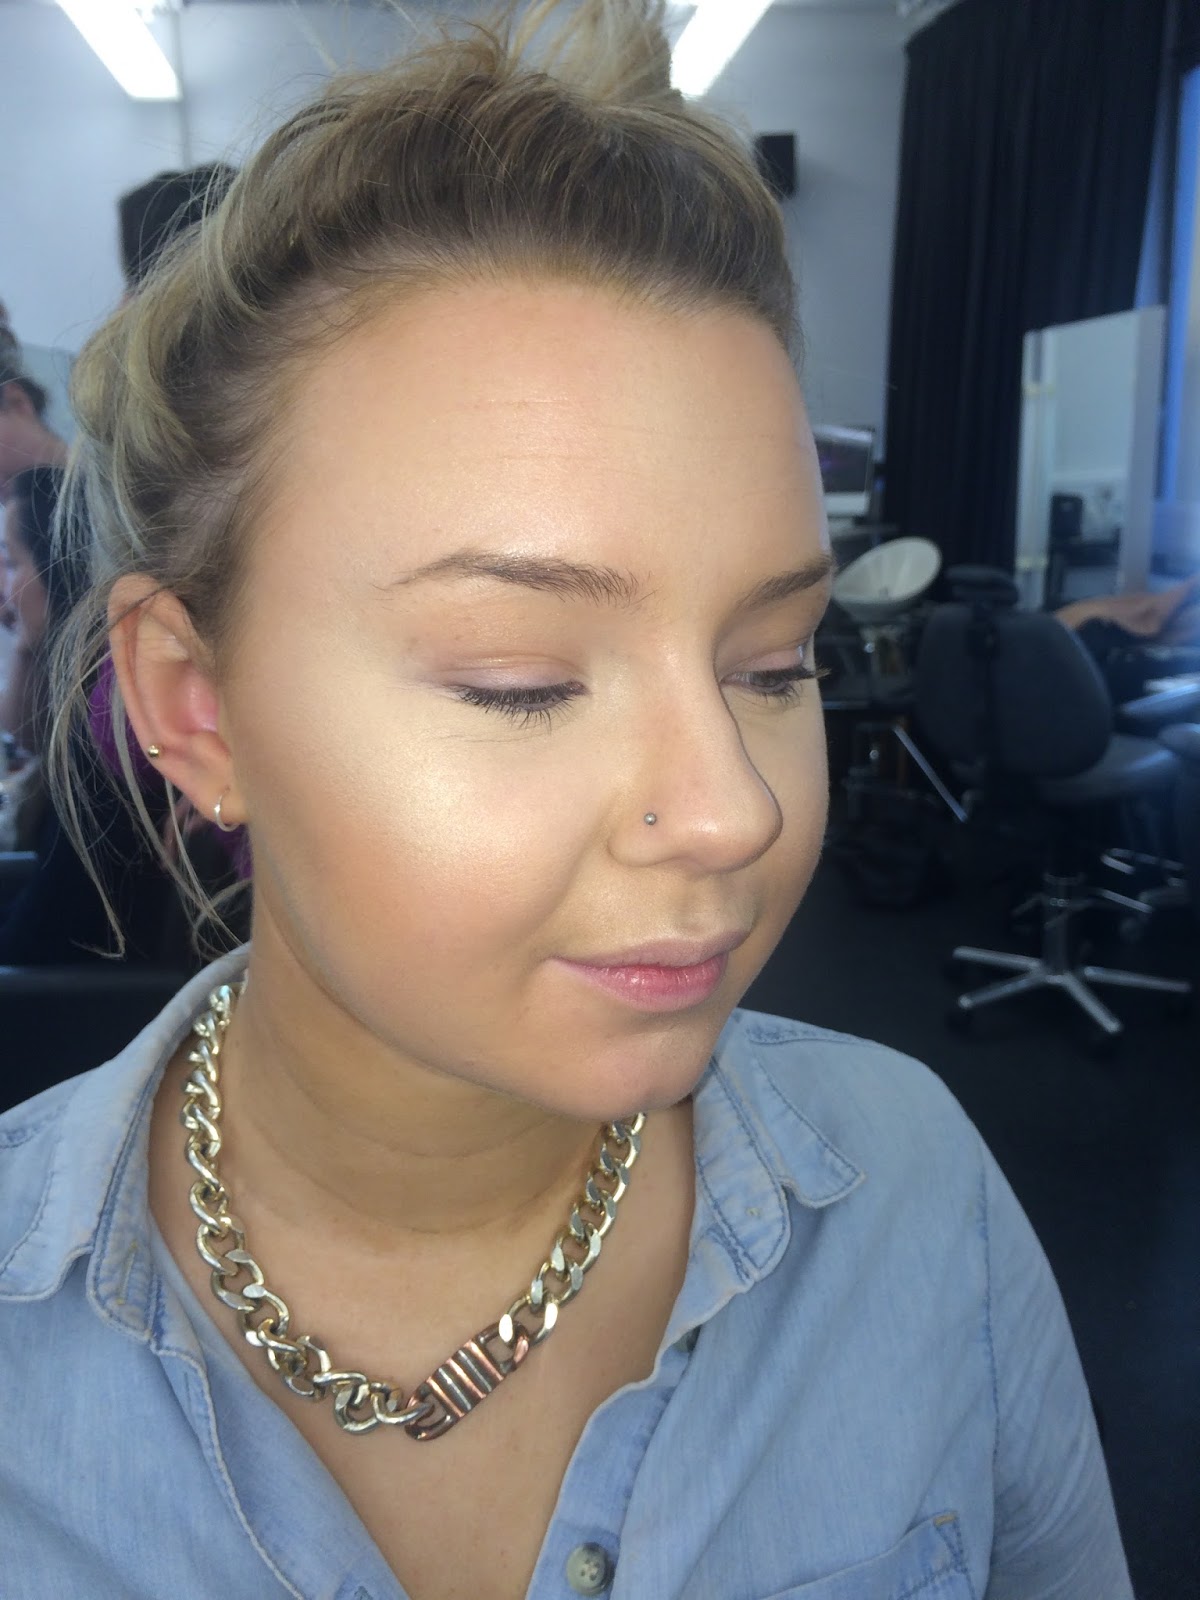
14. I applied some concealer, that was a shade lighter than the foundation colour to highlight, under the eyes, down the centre of the nose, on the cupids bow, on the chin and in the centre of the forehead. I blended this out with a fluffy concealer brush.
15. I then powdered under the eyes with a small fluffy brush and then powdered the rest of the face with some translucent powder and a big fluffy brush. I wanted to set the makeup but didn’t want it to look overly powdered so I only used a small amount.
16. I didn’t add any contour, but I added a bright rose coloured blush to the apples of the cheers and blended it backwards along the cheek bones.
17. I finished the look off by adding a bright baby pink to the lips with a lip brush to match the cheeks.

Hair

Equipment:
-Brush
-Rollers
-Hair grips
-Tail comb
-Hair elastic
-Curling tongs
-Hair spray

Step by step:
1. Brush all the hair back and put on the heated rollers.
2. Put five blue rollers, going away from the face, at the front of the hair. Make sure there is one in the middle and two either side.
3. Continue this backwards in a brick work pattern so that when the rollers are taken out there are no gaps. Stop this when you get to the crown of the head.
4. Take the remaining back section of hair into a side ponytail, making sure the hair is very smooth, and secure with an elastic band.
5. Hide the elastic band by taking a small section of hair out of the ponytail and wrap it round the band. Discretely secure this with a hair grip.
6. I curled the pieces of hair on either side with curling tongs, away from the face.
7. Take the rollers out after they are completely cooled and set.
8. Starting at the back row, backcomb each section of hair from the back, all the way to the front.
9. After all the hair is backcombed, take a comb and lightly smooth the very top layer and shape it into a bee hive in the height and shape you want.
10. Once you have the shape you want, curl the hair under and secure it with hair grips. Try to make this look as neat as possible.
11. I kept pieces out of the bee hive on either side of the face to frame the face and add a more girly, modern look. I curled these pieces with curling tongs.
12. I finished the look off by smoothing any unwanted fly aways.

Final look


I am really happy with how the makeup turner out because of the fun, bright colours used and big lashes. I think I matched the foundation colour well with the neck, however I could have brought it further down the neck to even out the skin tone. I like the placement of the blush and how soft it looks. The main thing about this makeup look that I think I could improve on is the shape of the cut creases. I think I could have made them a lot more even and symmetrical if I spent more time on them. I also could have spent more time perfectly the final look, as I didn't notice that there was a black mascara smudge under her right eye, which makes it look slightly messy. Another improvement I could have made would be to add lower lashes with black eye shadow because it would have emphasised the lower lash line and given it a more accurate 1960s look. I am happy with the hair overall; however I think I could have made the bee hive a lot more neat and even. I have struggled with bee hives before and getting them into the right shape, but I definitely need to practice these more if I ever want to use them in the future. I like that I added the curls either side of the face because I think it give a more fun, girly look and it makes it look more modern. I also like that I curled the side ponytail; however I think I could have curled the ends more as it looks like I left the very end of the hair out of the curling tong. 

1940s Makeup and Hair

Makeup

Equipment:
-Moisturiser
-Matte primer
-Foundation
-Buffing brush
-Light/medium brown for brows
-Small angled brush
-Concealer
-Lip brush
-Eye shadow primer
-Powder
-Medium brown eye shadow
-Fluffy brush
-Eye liner
-Mascara
-Duo lash glue
-Natural fake eye lashes
-Blush palette
-Blush brush
-Matte red lipstick

Step by step:
1. I first moisturised face and added a matte primer to the skin to prepare the skin for makeup application.
2. I applied foundation all over the face, to match her neck, with a buffing brush to make her skin look as flawless as possible. I made sure to blend this onto the ears, down the neck and into the hair line.
3. I next took some light brown eye shadow and a small angled brush and filled in her eye brows to give them a more prominent shape. I wanted them to look very defined to I cleaned the eyebrows up with concealer and a lip brush to make them sharp. 
4. I used an eye shadow primer all over her eye lids and under neath her eyes so that the eye shadow would last all day and I then set this with some powder.
5. I lightly added a medium brown eye shadow into the crease with a fluffy brush and on the outer third of the eye lid to give the eyes some definition. I didn’t add any eye shadow along the lower lash line. 
6. I added a very thin line of eye liner along the upper lash line and created a very small wing to give the eye a more feline shape. 
7. I added mascara to the top and bottom eye lashes, making the eye lashes look very feathery and light. 
8. I applied some natural looking fake eye lashes to the upper lash line using duo lash glue. 
9. I added some lighter highlight colour to the inner corners to make the eyes look more awake and open, as I felt the eyes looked slightly dull with out this. 
10. I applied some concealer under the eyes and on any other imperfections and blended that out with a fluffy concealer brush.
11. I powdered under the eyes and all over the face heavily to set the makeup and give a powdery look. 
12. I added some rosy blush to the apples of the cheeks only to give a doll-like look.
13. I finished the look off by adding a matte true red lip to the lips with a lip brush. 

Hair

Equipment:
-Tail comb
-Heated rollers
-Hair pins
-Hair grips
-Hair spray

Step by step:
1. Using a tail comb, create a centre parting.
2. Take two small sections either side of the parting, at the front of the head, and roller them away from the parting. Use white rollers for this.
3. After you have done four rollers on top of the head, do two white rollers going away from the face, horizontally. Secure all these rollers with hair pins.
4. Take a section behind the middle parting and roll the hair away from the face, using a red roller.
5. Do a brick work pattern all the way down the back of the head. Use the red rollers for about three rows and them blue for the bottom two of three rows.


6. Hair spray all over the head and wait for the rollers to cool and set.
7. Once the rollers have been left to set, take the rollers out and comb the front sections together, meaning comb the four white rollers on each side of the parting together.
8. Comb these sections round your hand and twist them up and backwards until you create a cone shape on each side. The shape you are trying to achieve it shown below. Secure these cone shapes discretely with hair grips the same colour as the hair.
9. Comb the back section through and round your hand to curl the ends under. Smooth and shape the hair to how you want.

Final look


I am really happy with how the makeup came out because it is very simple, but how the red lips and eye liner give it a very glamour and sexy look. I really like how defined the eye brows look because they look very clean and sharp. I did the look with and without the inner corner highlight and, altho I know if isn't accurate of that era, I thought the inner corner highlight really opened up the eyes to make them look brighter so I decided to modernise the look slightly with this added element. I like how natural the eye lashes look, but also how they are slightly longer on the sides to help give the eye a more elongated, feline shape. I think the blush on her right cheek looks a lot more even and soft that the blush on the left cheek, which looks slightly blotchy, and I think that's because I added it more gradually which made it easier to blend out. To improve the look, I would have brought the foundation colour further down the neck to cover and discolouration. I would also powder slightly more around the nose because the camera flash makes her look slightly oily around there, which is not the matte look that was popular in the 1940s. I really like the very true red colour on her lips and how evenly it is applied, giving a very clean finish. I am happy and confident with how I applied the rollers into the hair; however I had trouble shaped the hair into even cones on either side of the head. I found it difficult to manipulate the hair to look the same on both sides because of the way the hair grew and because of how the hair was twisting. I need to practice this technique further if I want to use it in a look in the future. I also need to work on my finishing touches, for example, smoothing fly aways.